Using the Center to control the perspective of effects
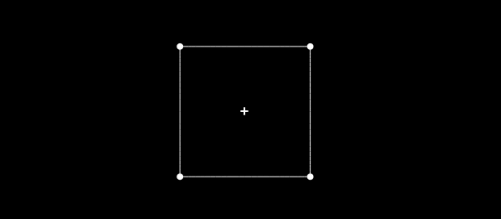
The Center is the + point that you see when you select a face. It can be used as the origin point in many Group effects and helps you add perspective to your mapping.
What's the point?⚓
The Center is a geometric property of a face. It's a point, and while it doesn't exactly serve the same purpose as other regular vertices, it behaves similarly in the canvas.
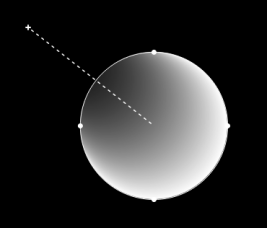
It is used to change the vanishing point of compatible Group effects, thus letting you adjust the perspective illusion.
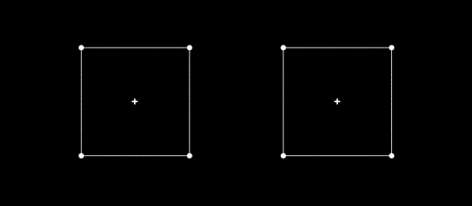
Each face has a unique Center, it is the same in all sequences where the face is used (like other geometric features, it is saved in Maps).
Note: the Center of a face cannot be deleted.
Using the center instead of the default origin⚓
To see the impact of the Center, you first need to toggle a compatible effect and set "Center" as the Origin point in the Path category.

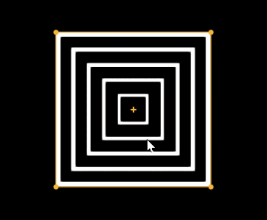
Now, when you move the Center point, you'll see the origin adapt to it. Since the Center of a face actually coincides with its center of gravity by default, you also have to move it first to see any change (more on the possibilities in the next paragraphs.)
The compatible effects are: all Outline effects, Rotation, Inside, Outside, Hypnotic, Mosaic, Radial Glow, Round Trip and Elastic.
Note: if you don't want your effects to be rendered outside of the Group outline, check "Clip the overflow of Group effects" in Edit → Preferences... → Output → Overflow. It'll give you the following appearance:
Placing the Center of a face⚓
By default, Centers appear when you select their faces. But you can also make them be visible all the time by enabling "Show All Centers" from the View menu.
Adjusting its position from the Canvas⚓
Like any other regular vertex, you can move the Center by simply selecting it and dragging it with your mouse pointer or using the arrow keys.
If you enable the Magnet Snap![]() , you can even snap Centers together. That way they'll coincide and be considered as the same point when you edit their Properties. (To unsnap, simply drag one on the shapes away.)
, you can even snap Centers together. That way they'll coincide and be considered as the same point when you edit their Properties. (To unsnap, simply drag one on the shapes away.)
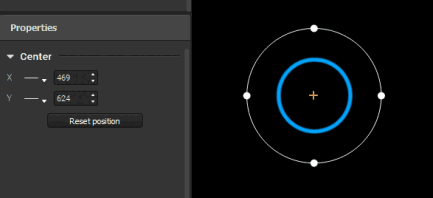
Adjusting coordinates from the Properties⚓
Speaking of Properties, you can also edit the position of a Center from the Properties panel on the left.
Indeed, when a Center is selected (or its associated face), its X and Y coordinates are displayed.
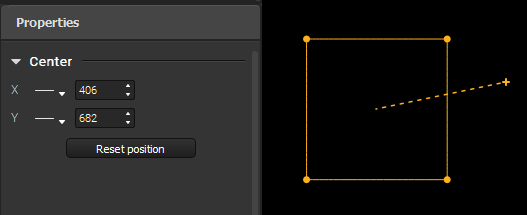
Note: the (0,0) origin of the coordinates is the top-left corner of the Canvas.
Resetting its position⚓
If you wish to reset the position of a Center so that it coincides with the center of gravity again, you can do so with the button in the Properties panel, or with the option in the "Transform" category in the right-click menu.
Note: when a Center is in its default position, it is not affected by shape transformations until you edit it manually, i.e. it stays stuck to the center of gravity.
Animating the position of a Center⚓
Using LFOs to automate the variation of a coordinate⚓
The coordinates of a center can be animated with automatic variators! As you can see in the Properties, each coordinate has an LFO selector, like you might have encountered on some Group effect parameters.
Simply select a type of variation and adjust the min and max limits of the range in which center will vary.
Using Controls to animate coordinates remotely⚓
The coordinate spinboxes and variation type selector are learnable elements, i.e. you can assign them a Keyboard or OSC control.
Note: at the moment, the controls you assign will only affect the selected center (or centers if they are snapped together) regardless of the sequence or map you're in: you can't target a specific center.