Controlling Proxima via DMX / Art-Net
DMX is a standard that is commonly used in stage lighting environments, to communicate between controllers (like a lighting desk or software) and lights, dimmers, or other fancy special effects devices.
Proxima supports DMX input, via the Art-Net protocol specifically. It means that you can use your lighting console to send commands to Proxima via a network.
Setting up an Art-Net connection⚓
First, head over to the DMX / Art-Net tab of the Controls Settings window (from Controls → Settings... or in the toolbar).
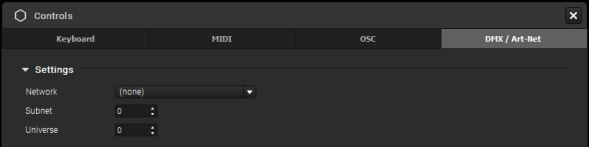
There, you have three things to configure:
- Network: since Art-Net transmits messages over the network, both Proxima and your DMX sender need to use the same connection (Wifi, Ethernet or Loopback on the same computer for instance).
- Subnet / Universe: choose which Subnet and Universe Proxima should listen to so that it is set to the same as your DMX sender (0:0 by default).
Managing Assignments⚓
Enabling Art-Net Learning
Once your connection is set, you can start assigning buttons, faders or anything your DMX sender has in store to commands in Proxima. To do so, you have to make the elements in the app interface "learn" which channel in your DMX interface they should react to.
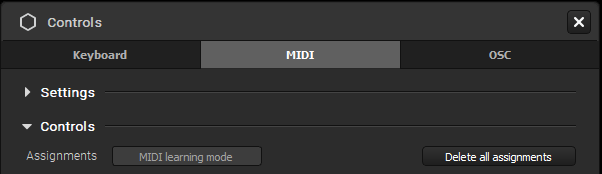
For that, you need to toggle the Art-Net Learning interface from the Controls window ("Art-Net Learning mode" button) or menu (Controls → Edit DMX Assignments). A colored overlay will appear over the elements you can map in the interface.
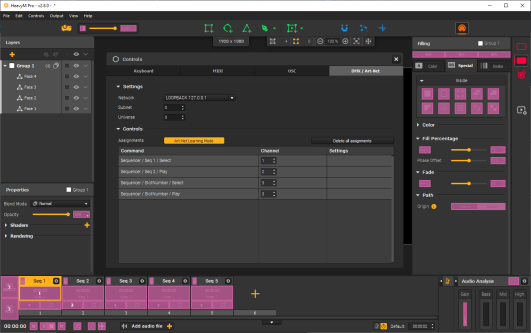
Note: notice these two new buttons that appear on the left of the sequencer?
Adding assignments
Select an overlay element with your mouse or trackpad (it will be circled in yellow) and just trigger the control item on your DMX sender that you want to use with it. This will associate the DMX channel and interface controls together and you'll see it appear in the list in the Controls Settings window.
Once you're done, you can simply toggle the Learning mode off with the same button/menu or with [Esc].
Note: you can assign the same channel to multiple commands at the same time. For example, one single button on your device can be linked to multiple effect toggles, so that when you hit it, all these effects turn on at once!
Editing assignments
To edit the assignments, just turn on the Learning mode again. Then, simply select the desired assignment and trigger the new DMX control you want to use.
Note: you can also directly edit the channel of an assignments in the table.
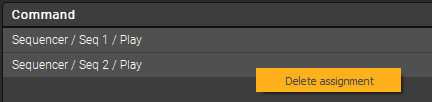
Deleting assignments
There are 3 possibilities to delete assignments:
When the Learning mode is ON, select an overlay and hit [Delete/Backspace]. This will remove the selected assignment.
Right-click on a single assignment in the table in the Controls window and click on the "Delete assignment"
option. This will remove the selected assignment.

Use the "Delete all assignments" button above the table in the Controls window. This will remove all DMX assignments in the project.
Saving assignments
The DMX assignments you set are directly saved in your .pxm project file.
Assignment settings
Each assignement you configure has a set of settings, as you can see in the assignments table of the Controls window.
![]()
For DMX assignments, you can edit:
- The Channel: simply input a new number to change the channel assigned to this specific assignment. You don't need to have your lighting desk or app connected or trigger anything in the learning mode for the change to be applied.
- The Range: this setting appears on sliders or spinboxes for instance. By setting a Min and a Max, you can override the range of the interface element in Proxima. For example if you set the range to 1 - 15 for the Thickness of the Border effect, when you move the fader you have assigned to it the values will only vary between 1 and 15 no matter how hard you move your fader!