Blending displays seamlessly with the Edge Blending module
In « Configuring and advanced projection setup with multiple displays », you've learned how to arrange the Output Setup in Proxima Composer in order to send areas of the Canvas to different display destinations.
In the use case we presented (two 1920x1080 projectors), the setup could end there if both projectors are meant to project on completely different spaces or side by side but with a gap between them. If you intend to use multiple projectors in order to expand your projection area, you'll need to use the Edge Blending module in addition.
What's the use of Edge Blending?⚓
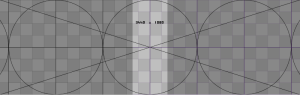
In reality, it's virtually impossible to combine precisely two projection areas side by side and make them seem like a single huge one seamlessly just with warping adjustments and no overlap or gap.
That's why, instead of trying to place the projection areas side by side, it's better to actually voluntarily make them overlap a bit and then apply some blending transformations to correct the appearance of the overlap strip.
These corrections are necessary, otherwise the overlap will be very visible, as you can see below:

Using the Edge Blending module⚓
Choose the Setup Output mode with
 or Output → Setup....
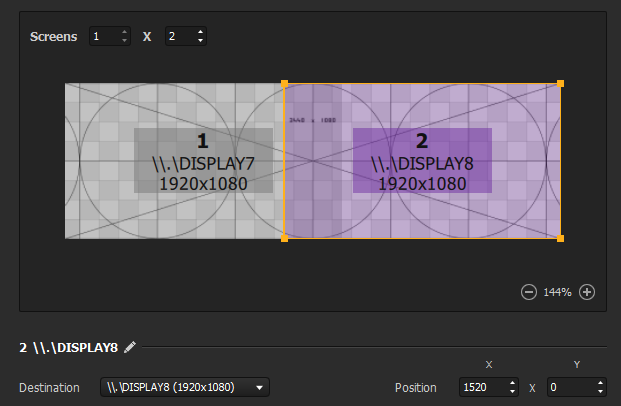
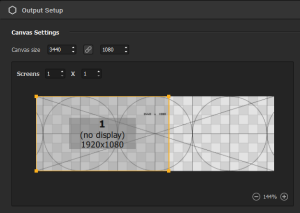
In a simple multiprojection case, our canvas size would be (1920+1920)x1080. But since we're going to make our areas overlap horizontally, we're gonna "lose" some pixels on the width.
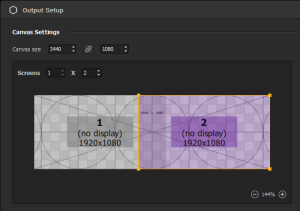
Let's say our overlap is on 400px this time, that makes our canvas size 3440x1080.
Add a second screen and snap it to the right side of the test card, so that the canvas is fully covered and the screens overlap by 400px.
Launch the fullscreen projection for each screen by selecting it and assigning it a Destination output.

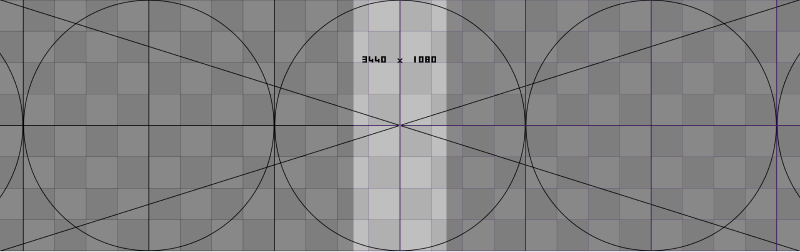
Now, you should see something like this on your projection surface (I mean the real life projection this time):
Note: at this step, if your projectors are not exactly placed side by side with the perfect overlap and you see on the test card that both areas don't fit perfectly, you should use the Wapring options in Proxima Composer to correct the geometry of the outputs until you reach a matching rectangular shape.
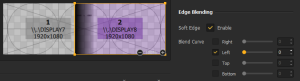
Assuming your outputs now create a perfect 3440x1080 rectangular projection area, there's one last thing to correct: the appearance of the overlap strip. To do so, first select each screen in the Output Setup and "Enable" their Soft Edge parameter one by one in the Edge Blending section.
It already should look better! As you can see, Proxima composer has detected that the screens overlap on one side and has already applied a correction automatically.
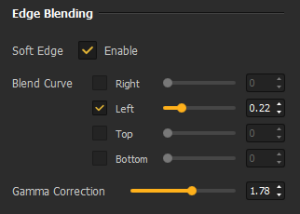
Now, it might not be perfect right away so it's up to you to adjust the Blend Curve and Gamma Correction settings, until you can see the overlap strip and reach two perfectly blended projection areas.
You're all set! Just remember to untick "Show test card" (top right corner) to reveal your canvas and click on "Ok" to save you setup and exit the setup window.